Essential Tips for Caring for Arum Lily – Zantedeschia Aethiopica Plants

Table of Contents
Arum Lily has become a popular choice for gardens and containers, given its wide variety of colours and beautiful bell-shaped flowers. These flowers will keep your garden fresh and colourful after the spring bloom has died down.
These bell-shaped flowers, with a single petal that wraps around just like a scarf, make for a spectacular display in your garden. The protuberance in the middle is a spadix.
The scarf-like long petal is a spathe(a kind of bract, which is a special kind of leaf, generally coloured, that guards its flowers). Arum lily, Zantedeschia Aethiopica, is not a lily; this plant belongs to the family of Araceae- a mono-cotyledonous family of flowering plants.
If you are wondering how to grow and raise these flowers, this article will guide you through all you need to know, from plantation to propagation to winter care. Let’s begin!
Aethiopica Plant Care While Growing
There are just a few things one needs to keep in mind when taking care of Arum lilies.
- In cold areas with dry and harsh winter winds with conditions of frost, protect the Arum lily rhizomes by covering them with a thick layer of mulch.
- The mulch can be of dried leaves, flax straw or fern, or hemp. The roots of Arum lilies can die because of frost, so this is an important step.
- Right before winter, you can take out a part of the rhizome from the ground and put them in a pot in your house. With good water and manure, you can enjoy arum lilies in the winter.
- You can also alternate arums with other summer-blooming bulbs. It will allow the soil to recover.
- Before the first frost spell settles, cut them short. They don’t usually require pruning.
- Please note that you must not cut them until their leaves have turned yellow. During this time, these plants are preparing for the next blooming season by securing their nutrient reserve.
- Fertilize them regularly during the growing season for healthy flowers. You can use organic manure like cow dung, fish emulsions, and bone meal, alternatively during the growing season. It will help boost plant growth.
- Once they enter their dormant period, they stop fertilizing.
- Arum lilies love moist soil; they grow well near ponds and streams in well-drained soil. As you can judge from their preference of habitat, these plants require ample water.
- Water them cautiously in low amounts in the beginning; once the flowers have appeared, start watering more regularly.
- Do not allow the soil to go dry. Loss of flowers, yellowing of leaves, and a frail stem are telltale signs that your plant is not receiving enough water.
- While the plants require a generous amount of water, do not overwater them, or you will make them susceptible to rotting.
- Arum lilies are an excellent choice for water gardens. These plants are semi-aquatic in nature and can be planted directly in water or near a pond or a stream.
Appropriate Growing Conditions for Arum Lily
Native to the southeastern part of South Africa, Arum Lilies have found their way to the UK and have been naturalized here with great success. They not only make for excellent plants for your garden and pots but are popular as cut flowers for bouquets too. Given their origins, they like any kind of low-lying damp ground for their growth.
They have an affinity for habitats like ponds, streams, and meadows that are close to waterways. They even grow in swamps and marshes of South Africa.
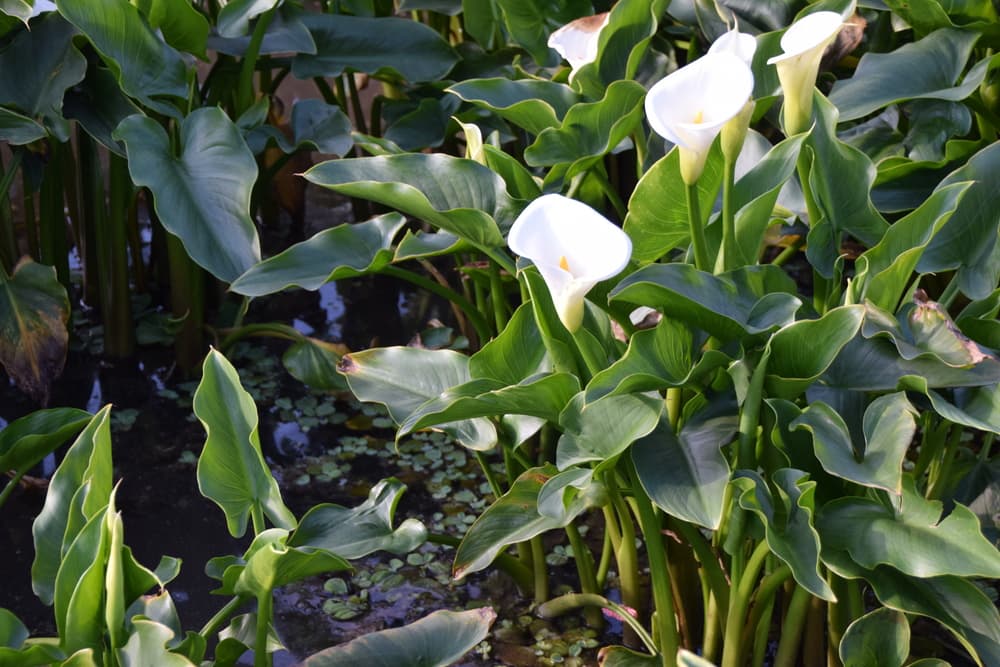
Zantedeschia Aethiopica has a hardiness rating of H4, which makes it almost adaptable to the UK climate. However, they require winter care, especially protection from frost; otherwise, they die.
These plants are tropical in nature, which means they like relatively warmer climates. Temperatures between 15 degrees to 26 degrees Celsius are ideal for them. As the temperatures drop below 10 degrees Celsius, these plants enter a state of dormancy.
During their dormant state, these flowers save resources and will bloom again the next year.
Soil and Sunlight Requirements of Arum Lily
Arum lilies have a preference for moist, rich, and well-drained soil. They grow well in areas around ponds and streams. If the soil doesn’t have enough drainage, these plants will be susceptible to root rot.
Garden compost is a good choice for treating your soil. You can use the tomato feed as a fertilizer; it is rich in potassium and will help the plants to grow healthy blooms. Before plantation, prepare the soil with a good mix of farm manure and humus or a fertilizer low in nitrogen. A loamy soil with a mix of silt, clay, and sand is ideal for them.
You can grow them in the ground or in containers as house plants. Choose a site with dappled sunlight, and ensure that the plants are not subjected to the scorching sun. A spot with indirect sunlight will be perfect for them.
Plantation and Propagation for Arum Lily
The most popular method of propagating Arum Lily is by division of rhizomes;
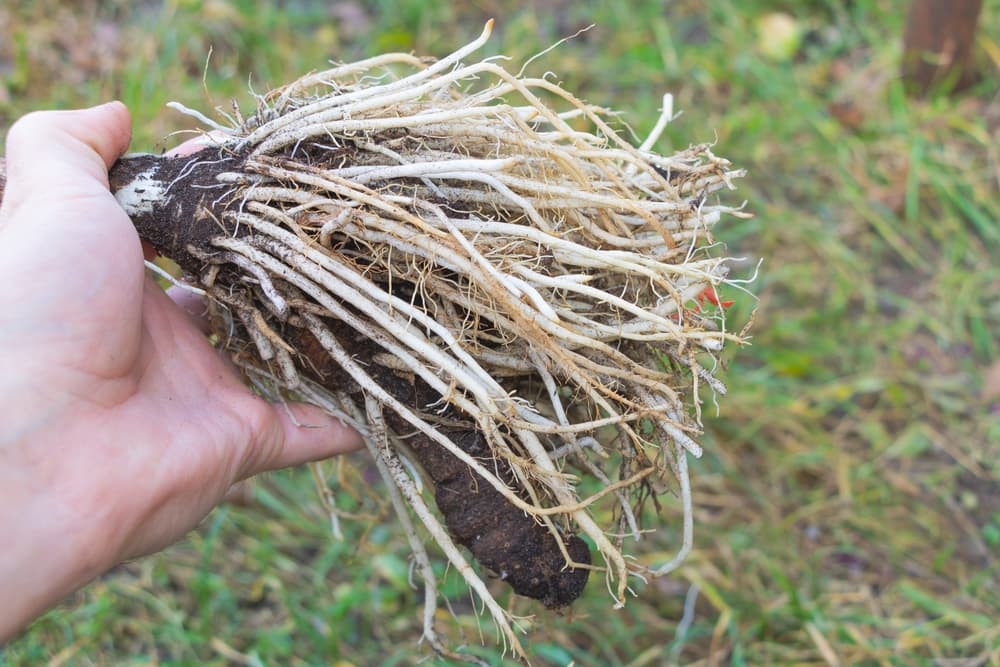
- With the help of a shovel, carve a circle around the Arum lily plant, and take it out of the ground. Clean any dirt sticking to the roots properly. You will be able to see the bulbs.
- Place the plant in a well-ventilated place where it cannot get direct sun exposure.
- Refrain from watering them for now; these roots need to be dried.
- Once they have dried, take a sharp knife and separate the clumps which have some roots attached to them.
- If you’re plating them in a pot, take a pot that is around 10-12 inches deep. Fill the pot with fertile, well-manured loamy soil.
- Gently sow the Arum rhizomes in the pot around 4-6 inches deep. Add a thin layer of potting soil/growing media over them and cover them up.
- Remember that the leaves of the Arum lily tend to spread out far and wide; considering this, plant only one rhizome in a pot. The pointed end needs to face up.
- Now it is time to water; Arum lilies need moist soil; to ensure they get enough water. Avoid overwatering or soggy soil, or they will start to rot. Place the pots in sparkling sunlight.
- Cultivars with a hardiness rating of H4 can be planted in the ground. Cultivars with a rating of H1C should not be planted outside in the ground; if you do so, every autumn, you will need to remove the rhizomes and store them inside, and ensure they are kept damp.
- Planting in the ground; Plant Arum bulbs at the start of the spring. Place them in rich soil around one and a half to two inches deep.
- As mentioned above, they have widespread foliage, so place these tubers 30-40cm apart to give them enough space.
Pests and Diseases
- Arum lilies grow in hot and moisture-rich conditions; these conditions are ideal for infections and pests. These plants are vulnerable to aphids and, at times to thrips.
- The more problematic of the two is the pest thrips. If your arum lily shows symptoms of a thrip infestation, remove them immediately. Prune any part of the plant that shows signs of this infestation.
- Some of the common symptoms of thrip infestation are irregularity and discolouration in the flowers. Infested parts will have a whiteish-grey colour with an unnatural glistening to them.
- Neem oil and diluted insecticidal soap are popular ways to treat a thrip infestation. You can also employ the generous services of their predators, like ladybugs.
Conclusion
Arum Lily UK is a beautiful flower that can bring exotic beauty to your backyard. Arum lilies are originally white in colour, but they have been hybridized and are now available in many attractive colours like pink, purple, yellow, black, red, and more.
These flowers are not that difficult to grow. You need to take care of a few essential needs; water requirement, sunlight, feed, and winter care (mulch). Besides that, watch out for any pest infestation.
If you are new to gardening, these flowers are a good choice for you and might encourage you to garden more. Watching the first flowers bloom from the rhizomes you planted can be a very rewarding process.
Follow the tips and instructions listed in the article and enjoy the beautiful bloom of Arum Lily in your backyard.

